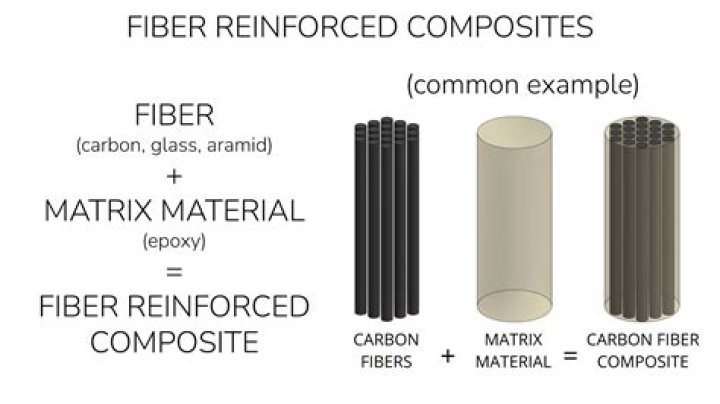
When using a table saw to rip stock, stand directly in back of the stock. You can cut a bevel or chamfer with a table saw by tilting the saw blade to the correct angle for the cut. Mortise-and-tenon joints are difficult to make using a table saw.
What tools do I need to make a mortise and tenon joint?
If you’re doing woodworking on a shoestring budget, you’ll be happy to know that the only tools you need to cut tight-fitting mortise and tenon joints are a square, knife and marking gauge, a fine-toothed saw, and a couple of sharp chisels and mallet.
How do I make a mortise and tenon joint?
- Step 1: Mark the Tenon Shoulder Line.
- Step 2: Mark the Tenon Cheeks and the Mortise Walls.
- Step 3: Saw the Tenon Cheeks.
- Step 4: Remove the Tenon Cheeks and Cut the Shoulders.
- Step 5: Cut the Tenon Sides.
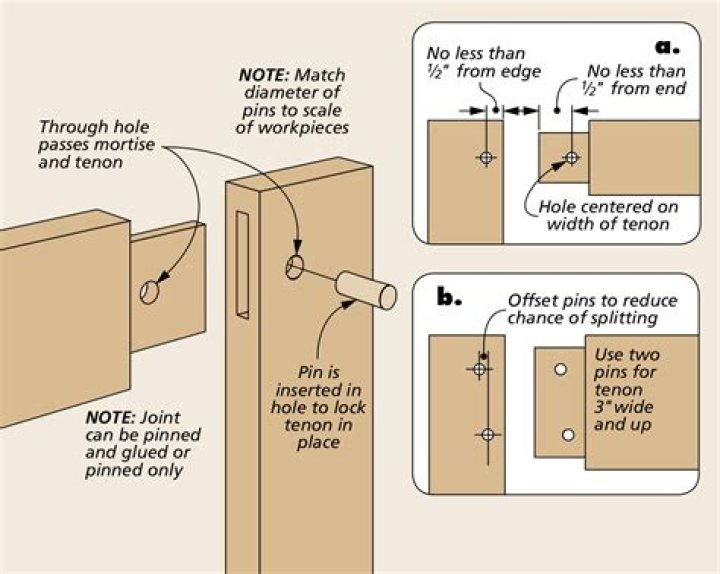
- Step 6: Layout the Mortise.
- Step 7: Chop the Mortise & Fit the Joint.
How do you cut a perfect tenon?
The dado blade often leaves small ridges on the tenon cheek. A quick way to remove these is to slide the workpiece sideto- side across the “high point” of the blade. Move the workpiece forward slightly between each pass to knock down the ridges. The opposite cheek can be cut exactly the same.
What are the disadvantages of a mortise and tenon joint?
The con to mortise and tenon is in the quality of the fabrication. If the proportions are incorrect the wood can shear on either side. This makes the mortise and tenon joint an incredibly difficult joint for the DIY’er to create.
Can you make mortise and tenon joints with a router?
The router table works well for mortises up to 1⁄4″ wide. With mortises larger than that, I find I have better control by plunging the bit into the work with a plunge router rather than plunging the work onto the bit.